Is That Expired Jar of Vaseline From 1970 Still “Good”?
Spoiler Alert: It’s Time to Toss It!
Let’s be honest: we all have that one item in the bathroom. You know the one. The jar you haven’t touched in years but for some reason still holds on to the sentimental value of your “first aid kit” from decades ago. Or maybe every time you look at it you think, “I might need that someday,” but someday never comes! I’m talking about that old jar of Vaseline—and yes, the one that’s been sitting in the back of your bathroom cabinet since the 1970s.
Now, I know what you’re thinking: “It’s Vaseline! It’s petroleum jelly! It’s practically immortal!” Well, let’s take a moment to debunk that myth.
A Blast From the Past (And Not the Good Kind)
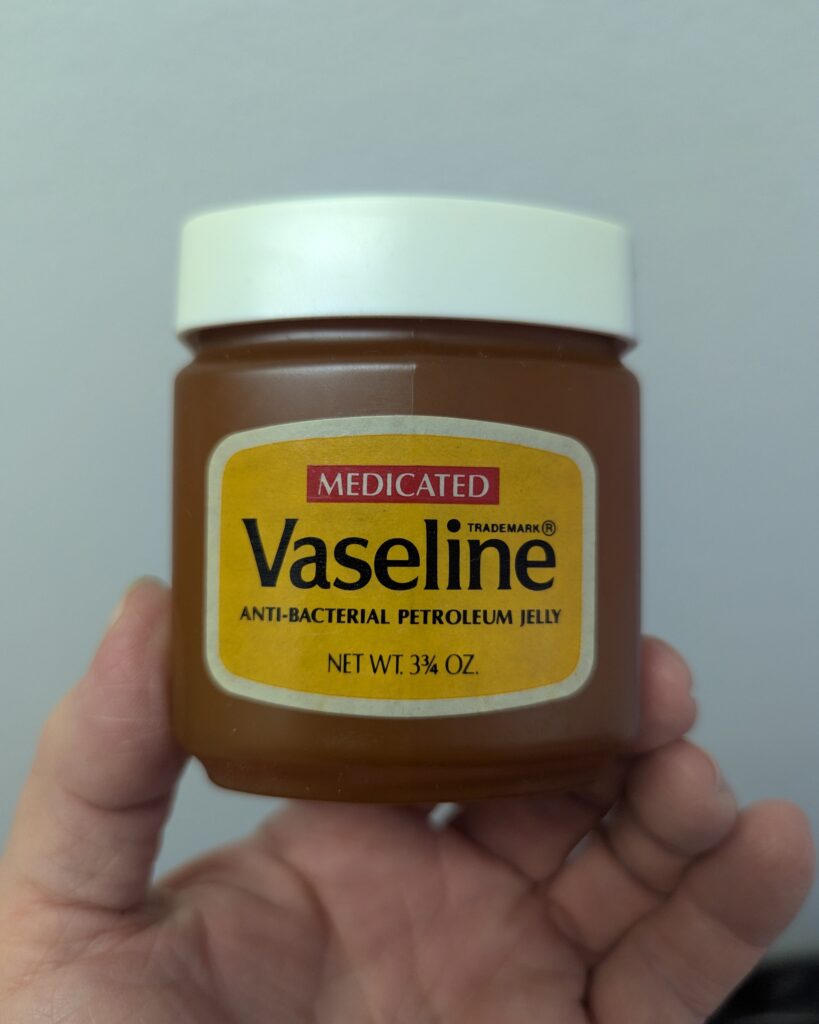
The jar I recently came across has some serious vintage vibes. This is not your run-of-the-mill modern Vaseline, folks. It’s the Carbolated Petroleum Jelly version, which is medicated and was produced by Chesebrough Manufacturing Company before they were bought out by Unilever in 1987. For context, this jar was probably made before 1974, and it’s missing one crucial thing: a barcode. (No, really. There’s no barcode. That’s how old it is!)
The formula itself contained carbolic acid, which was meant to act as an antiseptic for minor cuts and scrapes. It was a miracle back in the day. But just like your high school jeans, it’s time to let this vintage item go. Even though it’s hard to part with something that’s been there through thick and thin (literally), we can all agree—it’s well past its prime.
Why You Shouldn’t Be Sticking Your Finger in That Jar After 1970
Here’s the truth: anything you dip your finger into repeatedly should be discarded after 1 month. This comes straight from the experts, including your dermatologist. Think about it: every time you dip your finger into that jar of Vaseline (no matter how “perfectly sealed” the lid is), you’re introducing bacteria, oils, and germs. The longer you keep it, the more you’re inviting unwanted guests to party in your personal care products.
So, while Vaseline may have served its purpose as an antiseptic back in the day, it’s no longer effective and certainly not safe to use anymore. If you’ve been secretly hanging onto this jar hoping it’ll magically cure a new burn or scrape, it’s time to let go of this relic and replace it with something fresh, functional, and safe.
The Practicality of Downsizing: Out with the Old, In with the New
Downsizing isn’t just about reducing the size of your home; it’s about eliminating the old clutter and embracing what you need now. That old jar of Vaseline? It’s not doing anything for you anymore—except taking up space and adding to your stress. By parting with expired items, you’ll not only free up space but also eliminate potential health risks.
Here’s a quick rule of thumb: If it’s been in your bathroom cabinet for more than a year and it doesn’t serve a purpose, it’s time to say goodbye. The clock has run out on that item, no matter how much you may try to justify it. (Yes, even that old tube of toothpaste you swear you’ll “finish soon.”)
How to Let Go (Without Looking Back)
Take a moment: It’s okay to be sentimental. The Vaseline jar likely came from a time when you first learned how to take care of yourself. But today, you don’t need to hang onto everything that reminds you of the past.
Be realistic: That jar of Carbolated Petroleum Jelly? It’s more a part of history than anything you should be using on your skin. Toss it with confidence, knowing you’ll find a more effective (and newer) alternative.
Celebrate the space: Downsizing your bathroom can be liberating! When you finally let go of those expired products you never use, you’ll be able to replace them with fresh, efficient products that really work for you.
A Final Word: It’s Time to Let Go of the Old (and the Expired)
So, let’s raise a glass (or a freshly opened jar of Vaseline)—to cleaning out the clutter and embracing a more organized, functional space. That old jar has served its time, and it’s time to move on to something better. Whether it’s skincare products, medicines, or old beauty supplies, get rid of those expired items and feel the weight lifted.
Remember: you deserve the best, and that means saying goodbye to what’s past its prime—like that vintage jar of Vaseline—and making room for fresh, effective solutions that will actually help you today.
Looking to declutter your bathroom and home even more? Check out our Senior Downsizing & Decluttering Tips, learn about our Estate Clearing Services, or get tips on Senior Moving Services to make your transition as smooth as possible.
Self-Care Tips for Senior Moving
Moving can be a daunting task for anyone, but for seniors, it can be particularly challenging. The physical and emotional stress of packing up a lifetime of memories and relocating to a new home can take a toll. However, with the right self-care tips, seniors can navigate the moving process more smoothly and ensure their well-being throughout. In this article, we will explore essential self-care tips for senior moving that can make the transition easier and more comfortable.
Moving is a significant life event that requires careful planning and consideration, especially for seniors. It’s essential to prioritize self-care during this time to minimize stress and promote overall well-being. From physical preparation to emotional support, there are several key aspects to consider when it comes to senior moving. Let’s dive into some effective self-care tips that seniors can incorporate into their moving process.
Self Care Tips for Senior Moving
Moving involves various tasks, decisions, and emotions. It’s crucial for seniors to take care of themselves throughout this period to ensure a smooth transition. Here are some practical self-care tips for senior moving:
1. Start Early and Plan Ahead
Moving requires careful planning, especially for seniors. Start the preparation process well in advance to avoid last-minute stress. Create a detailed moving checklist, outlining tasks such as sorting belongings, packing, notifying relevant parties, and arranging transportation. Having a plan in place will help alleviate anxiety and ensure a more organized move.
2. Enlist Help from Family and Friends
Don’t hesitate to reach out to loved ones for support. Moving can be physically demanding, and having a helping hand can make a world of difference. Whether it’s packing, lifting heavy items, or emotional support, family and friends can provide valuable assistance throughout the moving process.
3. Declutter and Downsize
Moving presents an excellent opportunity to declutter and downsize belongings. Seniors can go through their possessions and determine what to keep, donate, or discard. Downsizing can make the moving process more manageable and also help create a fresh and organized living space in the new home.
4. Seek Professional Moving Services
Consider hiring professional movers who specialize in assisting seniors like Arizona Senior Moving. We have experience handling delicate items and can provide extra care during the packing and transportation process. Professional movers like Arizona Senior Moving can also alleviate physical strain and ensure the safety of belongings.
5. Stay Organized with Labeling
Labeling boxes and containers is essential for efficient unpacking. Clearly mark each box with its contents and the room it belongs to. This labeling system will save time and effort when settling into the new home. Additionally, it will prevent confusion and frustration during the unpacking process. Ask us about our unique and efficient system of packing your belongings so they arrive safely and so that we can put them away for you quickly.
6. Take Breaks and Rest
Moving can be physically exhausting, so it’s crucial for seniors to take regular breaks and rest as needed. Overexertion can lead to fatigue and increased risk of injury. Pace yourself throughout the moving process and listen to your body’s needs.
At Arizona Senior Moving Company, we only move seniors. We are passionate about helping you have a peaceful move.

Small Ways to Personalize Your Senior Living Apartment
Moving into a Senior Living Apartment can be an exciting but strange time in your life. You’re not alone if you feel like your apartment isn’t quite yours yet. Adding your personality to the home can help you acclimate and warm up to your new life. And doing so doesn’t have to cost you a lot of money or time. Instead, use the suggestions below to spruce up your new home with minimal effort and money.
Add fresh plants
Head to a local garden store or grocery store and choose a bouquet of your favorite flowers or a new potted plant with lush greenery. Natural pops of color can make any room feel more inviting, and a bouquet placed on the kitchen island or counter or the table can cheer up your space. Plants can draw attention to central areas or fill in empty spaces. Plus, flowers make for a great conversation starter with guests.
Accent a wall
While you may not be used to the layout of your new home yet, an accent wall can help you solidify the flow of an area and add layers of your personality. There are a few avenues to choose from when it comes to accent walls: you can have maintenance paint them, strategically place a favorite piece of furniture as a focal point for the wall, or hang a large picture or picture grouping to create an accent wall.
Clean with your favorite products
Everyone’s home has a distinct smell. Typically, your home will take on the scent of the cleaning products you use. Most people don’t recognize their home’s scent, but if the smell of your new home feels strange and unfamiliar, dust your furniture with your favorite furniture polish, quickly wipe the counters with your favorite cleaner or dish soap and rag and spray your favorite air freshener or place fragrance plugins in a few outlets and you’ll notice how much more familiar and cozy every room feels.
Customize your storage
Finding a place for your belongings is a big step you can take to make your new place feel like home. From hooks by the front door to self-closing drawers and under-bed storage, think through each room in your home and how you can make it more functional.
Hang a photo wall
Display or hang your favorite photos of your family, friends, and pets on a wall where you can enjoy them. Keep them in the frames or pick new frames that match your color scheme.
Decorate the front door and add some decorations
Impress your guests by hanging a wreath on your door. Some communities allow for decorations such as plaques or figurines next to your front door. Display things to spruce up your front door and express who you are. It will help you find your apartment and introduce you to your neighborsIf y.
Spruce up an outdoor space
If you have a patio, it’s important to create a space for chatting and relaxing. Invest in comfortable chairs that will still give you plenty of space to easily maneuver your patio. A small side table or two is all that you need on your porch if your space is limited. Senior Communities often have large outdoor patios that are centrally located with comfortable seating so that you can enjoy the outdoors. Don’t take your large patio furniture for your small patio or porch, enjoy the benefits your Senior Community provides with their larger outdoor seating areas. This can encourage you to spend time getting fresh air and decompressing from your big move. Plus, it’s a great way to chat with neighbors passing by and have a safe social distancing location to enjoy a few drinks and snacks with them.
By making these changes, you can turn your new Senior Assisted Living Apartment into a home quickly and easily. Arizona Senior Moving can help you with all these ideas on your move-in day!
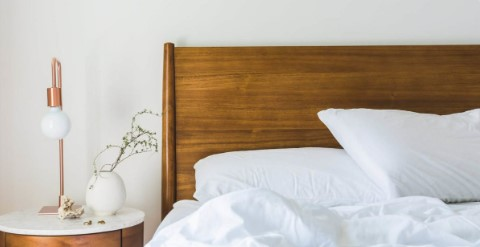
How Clean Is Your Bed
We wash our sheets on a regular basis, but what about keeping the rest of our bed clean? Here are some tips for cleaning your bed to help you have a healthy night’s sleep!
Dusting
It’s easy to overlook this step when you’re cleaning your bed, but it’s important to dust your bedframe about once a month. When you see particles floating in the air on a sunny day, most of them are dead skin cells. Especially if you have allergies, you don’t want your bedframe covered with dust . This could have you coughing and sneezing constantly. Make sure you dust in a direction that brushes the dust outward and away from sheets, pillows, and blankets. (Of course, vacuum the floor after brushing dust onto it.) It’s a good idea to take this step before cleaning the rest of your bed so that if any dust does end up on the bed, you’ll end up removing it when you clean your sheets and mattress.
Caring for your mattress

Take the time to clean your mattress about every six months. You should start by vacuuming the mattress. Then, sprinkle it with baking soda, rub that in with a scrub brush, and let everything sit for ten minutes. Next, you should vacuum your mattress again and remove any stains using these DIY stain removal mixtures. Then, if possible, and if your mattress doesn’t have a pillow top, flip the mattress over and repeat these steps. Even if you don’t notice obvious stains on your mattress, mattresses build up sweat over time. You should also rotate your mattress every three months to a year, unless you have a Tempur-Pedic or Sleep Number mattress.
Washing sheets and pillowcases
Every night, you rest your body on your sheets and lay your head down on your pillow. You probably don’t think about the last time you cleaned your sheets or pillowcase because they don’t appear dirty. At the same time, you wouldn’t wear your clothes for weeks or months on end, but many of us sleep in our beds night after night without cleaning our sheets. Although your bed might look clean, it actually builds up oil and sweat each time you sleep in it. This could contribute to skin issues like acne. For optimal cleanliness, you’ll want to change or wash your sheets once a week or once every two weeks with hot or warm water.
Cleaning blankets and pillows

Check the tags on your comforter and pillows for care instructions that explain how to clean these items. Typically, you can throw both into your washing machine at home using cold water and dry them on low heat. You should wash all the pillows and blankets on your bed at least twice a year. This will protect against dust mites. If you’re feeling sick and spending a lot of time in your bed, make sure to wash everything on the bed once you feel better to remove lingering germs.
Protecting against bleach
Many acne medications contain benzoyl peroxide, which reduces redness of zits because it acts as a bleaching agent. When you wear these products on your face or body during the night, you can stain your sheets, pillowcases, and blankets with bleach. This leaves everything looking discolored and splotchy. You can either opt for white sheets or purchase benzoyl-peroxide resistant sheets, which won’t discolor even if you use bleaching acne medication or other products. You’re free to purchase colorful sheets without staining your pillowcase.
If you’re sleeping eight hours a night, you’re spending about one third of your life in your bed. It’s worth it to spend a little time making sure this is a clean, healthy space for you to spend such a large portion of your time.